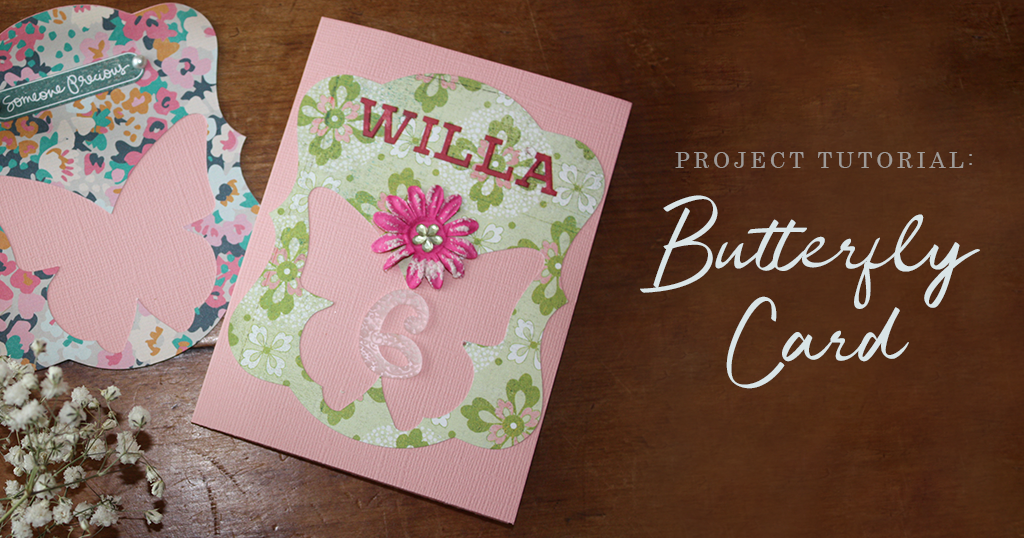
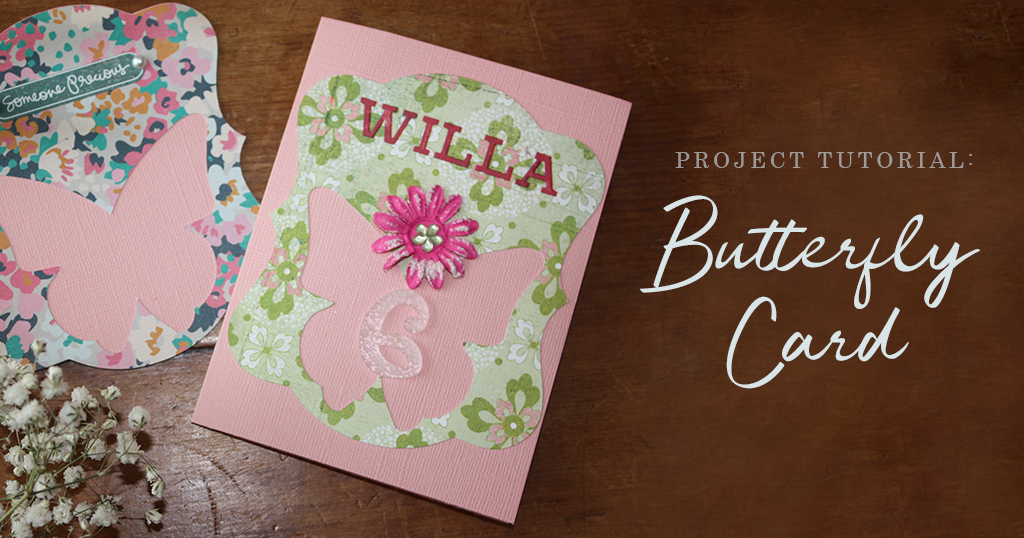
Are you a Silhouette Studio software beginner? This Craftercuts Butterfly Card Silhouette Beginner Project by our Smart-Silhouette partner is a great project to get you started!
First, you’ll need to go shopping. Here are the materials needed for completing this Silhouette Butterfly Card Beginner Project. If you have questions as you go, just comment and we’ll respond below!
Shopping for your Butterfly Silhouette Beginner Project
Cardstock
Although you can use plain or patterned cardstock for this Butterfly Card Silhouette Beginner Project, it's highly recommended to start with cardstock if you are a Silhouette Beginner. It’s cheap, readily available and versatile. You will need enough for both the butterfly shape and the card base.
Silhouette Adhesive
Any adhesive will work for your Butterfly Card Silhouette Beginner Project.
Embellishments (optional)
Let your imagination take over here or grab whatever you have on hand.
Getting Started: Creating a Butterfly Card Silhouette Beginner Project
This Butterfly Card Silhouette Beginner Project requires what is called a ‘free shape,’ which means it a shape that comes with your machine and is already installed on your computer. You don’t have the butterfly shape if you don’t like it or can’t find it. Instead, just select a different free shape. Now, let’s get started!
Step 1: Setting up a New Silhouette Studio Project
Make sure your paper is set to the same dimensions as the paper you are using. For directions, watch this Silhouette Studio tutorial video.
Step 2: Adding a Mat Design to your Silhouette Beginner Project
Open your ‘Library’ and look for the design called ‘Mat.’ Since it’s a free shape that came with your machine, you should find it in the ‘Recent Downloads’ of your ‘Local User’ folder if you haven’t moved it. Double click quickly to put the image on the page.

If you don’t have a Silhouette Cameo 3, then look for a simple, solid shape with no internal pieces or skinny parts. The example shows a tan fill color, but yours might differ. Working with an unfilled shape will make it difficult to select with your mouse.
Step 3: Adding a Free Shape to your Silhouette Beginner Project
Now, go back to your library, time find the shape called “Butterfly.” If you don’t have that exact shape, use one that works for your mat. Look for something simple, solid, non-skinny with internal pieces. To avoid sharp turns on the design, double-click to put the butterfly (free shape) on the same page as your mat shape.

The example shows a green fill color, but yours might differ. Don’t choose the same color as the mat piece. Working with unfilled shapes, which makes the project harder to visualize.
Step 4: Resizing Pieces for your Silhouette Beginner Project
To use your Silhouette Beginner Project as a card, the mat needs to be the right size to fit. Select the A4 envelope dimensions, which is 1/4 of an 8 ½” x 11” page, or 4 ¼” x 5 ½”. Since the free shapes are bigger than that, you will need to resize them.

Move the butterfly shape off to the side of the mat area so that you can work the mat alone. Then, grab the corner box and move it in until the width is about 4 ¼ or less. The height should then be a little over 5”. You don’t need an exact size as you’ll learn later in the blog. Beware of using the side or top and bottom control boxes to resize the image. This will distort the height-width ratio.

Now, you’re going to pull the butterfly back over to the Silhouette Beginner Project. You’ll need to make it smaller to fit on your mat. Once again, used the corner boxes to reduce the dimensions. Don’t go too small – just small enough to fit.
Step 5: Aligning your Silhouette Beginner Project
Move your butterfly onto the lower edge of the mat shape. Eyeball your Silhouette Beginner Project to make sure the butterfly is in the middle. You can also use the align tool to help you do this (see next example).

In the icons that go down the right side of the software, look for the one that looks like a bar graph – a thin horizontal line with vertical rectangles of various sizes on it. Click that to open the Transform panel.

The first tab in this panel is for Align. Then, select both the mat and the butterfly at the same time to align them. You can do that by:
- Selecting one, holding the shift key and selecting the other.
- Use the Select All icon in the upper left.
- Left clicking and dragging a box around both shapes. As you do this, notice that the software shows a box with a moving dotted line that goes away when you release the mouse. You’ll know both shapes are selected because you will see the bounding box around your mat and a dark gray box around your butterfly.

Once you have both selected, look for the ‘Horizontal’ alignment option in your ‘Transform’ panel. Click the middle one, which will align both pieces along their vertical centers. Not to be confused, it says horizontal but uses a vertical axis. It looks at how the images lie side-to-side (horizontally) and align the centers of each piece. For help, check out the example below.
Step 6: Moving the Pieces of your Silhouette Beginner Project to a Smart Spot
Next, select both images and move them up to the upper left corner of the Silhouette Beginner Project. Why? Because you want to make the best possible use of your materials. Cutting right in the middle of the page will waste paper. You want to leave some margin space above to the left of your image. Be aware of the ‘Cut Border.’
Step 7: Cut Settings for your Silhouette Beginner Project
Once your Silhouette Beginner Project is all set up, it’s time to tell the software what material and tool you are using. Click ‘Send’ in the upper right.
Then, select ‘Cardstock, Plain’ from the list of materials. You will then see the recommended settings. To double-check your settings, review the following:
- ‘Tool 1’ is selected at the top (or the left tool holder on a Cameo 3 or Curio)
- Material selected is ‘Cardstock, Plain’
- Action selected is ‘Cut’
- Tool selected is ‘AutoBlade’
- The bottom settings are: Blade = 3, Speed = 4, Force = 20, Passes = 1
- Line Segment selected in ‘Overcut Off’
By this point in the Silhouette Beginner Project, you should be making cuts on the paper. If not, try the following:
- Turn on ‘Line Segment Overcut.’ It will be on default at 0.1 (as long as you have the most recent software update.
- Check that your machine is properly connected. If it’s plugged in and turned on but the software isn’t reading it, check the Silhouette America website.
Step 8: Setting Up and Loading the Mat for you Silhouette Studio Beginner Project
Now, you’re ready to send the job to the machine. Be sure to check for the
Place your cardstock on your mat, making sure it’s pressed down well. Line-up the left side of your mat with the correct guideline, The, load the mat.
Step 9: Cutting the Cardstock for your Silhouette Beginner Project
Now, you’re ready to send the job to the machine. Be sure to check for the following:
- Roller bar locked
- Mat loaded
- Blade adjusted if not using AutoBlade
- Blade loaded
- Blade locked
- Cut settings tested and double checked
- Cut Preview checked

Step 10: Checking the Cut of your Silhouette Beginner Project
Before you unload, make sure to check the cut. Once you’re sure it’s cut all the way through, then unload. Be sure not to unload before checking the cut first.
Step 11: Removing your Silhouette Beginner Project from Mat
If your mat is still relatively new, remember to flip the mat over and pull it off the cardstock rather than pulling it off the mat. This will help you with curling. If your paper isn’t covering the whole mat, use the mat cover to protect the exposed sticky areas. You don’t want all the glitter and paper tidbits from your craft all over your mat.
Step 12: Assembling Butterfly Card Silhouette Beginner Project
You’re almost done! This is the last step of this Butterfly Card Silhouette Beginner Project. Attach the mat to your card base and add your choice of embellishments. To mix it up, you can also cut another mat in a contrasting paper without the butterfly and make a flat card.

You did it! Great job! After you save your finalized Butterfly Card Silhouette Studio Beginner Project, share it with us on Facebook, Pinterest, Instagram or Twitter, and don’t forget to tag us @craftercuts or use hashtag #craftercuts in your caption.
To browse our Silhouette Bundles and other products, click here to visit our website! For more tips and Silhouette project ideas subscribe to our blog for weekly Craftercuts news, tips and updates.


